If you have ever made a big fancy cake before, you know that it is a lot of work. It is fun work and it's rewarding and the look on peoples faces when you give them their cake is priceless and enough payment in itself. I love making cakes for people and I love it when people give me free reign when designing the cakes because then I feel free to be as creative as possible. It's awesome!
Some people don't get why it takes so long to make the cakes that I do. I completely understand where they are coming from. I didn't think it took that long either... until I made one and then I understood. So here are some of the steps to making a cake, and, I didn't even take pictures of it all, but what can I say, I'm forgetful! :)
First you must make the cake of course :)
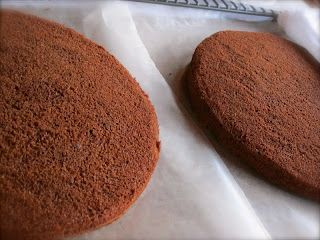
Now you can make your cake from scratch or from a box. It all depends on what you prefer! Making the cake actually takes forever. Well, if you had lots of pans and a double oven it wouldn't take that long, but I only have two pans of the big sizes and one 6 inch pan, so that's 12 minutes per layer times however many layers there are. This particular cake had lots of layers because it was an orange creamsicle devil chocolate cake and it needs lots of layers... the more layers the yummier it tastes!
You want all your layers to be the same so you may want to measure how much you put into each pan...
YUM!!!! Then the cakes must cool down :)
For this cake I had to make the delicious orange cream filling.
Then we fill the layers! Oh yes! Come to Mama :) In the middle is the orange filling, then a ring of cool whip, and then chocolate frosting! The orange filling melts if it's next to the chocolate frosting, so there must be a barrier in between them.
Continue stacking...
You could just leave the cake like this if you wanted too... but what fun would that be? :)
Then we dirty ice the tier. I covered the whole thing in chocolate icing and it needs to be as smooth as possible, though it doesn't have to be perfect because you are going to cover it in fondant... Then you stick it in the fridge to settle and get the frosting to harden a bit.
Then, bad me I didn't take pictures of it, but you cover the tier in fondant. This takes practice and more practice. This cake had some ripples in it that in some cakes I would have normally smoothed out but the theme was a cowboy cake. That meant that I got to do a bandana pattern on the cake and I thought the ripples added character to the bandana/cloth idea. Anyway, I made a fondant rope, scratched it to make it look more real and put it around the bottom of both tiers. Then I hand painted the bandana pattern on both tiers as well.
For whatever cake you make, and if you want figures on the cake, this is when you would put them on. You can cut out fondant figures by hand or with cookie cutters. You attach them to the cake with either water or frosting, both act as a glue.
Then stack the tiers and put on any final touches. And there you have it! A cowboy themed birthday cake!


No comments:
Post a Comment
Drop a note to say 'Hello' or whatever else you want to say! Love hearing from you!!!